
How to use the TP-Link TL-WA801N or Mikrotik mAP Lite to allow communication and control of a RAD8 over a wired Ethernet connection.
Introduction
The RAD8 includes built-in Wi-Fi, which provides network access while maintaining our IP67 waterproof design. In most situations, the RAD8 can connect to an available 2.4 GHz Wi-Fi which is part of the local network. This may not always be possible; either Wi-Fi is not available, is too far away, is not secured, or for any other reason, a wired connection may be preferred. Note that any additions or modifications to a network should be approved by network administrators.
⚠️ The Access Point devices discussed have been tested by Durridge and are shown to work well, but are not Durridge products, and we do not provide technical support for them beyond this Application Note example. There are many alternatives that can provide the same functions.
Overview
In general, the approach is to connect an Access Point device to an existing network with DHCP (to provide IP addresses automatically), and specify a SSID (Wi-Fi broadcast ‘name’) and password, which will then ‘bridge’ the wired network to a wireless one that can be used by the RAD8. In most cases, this is all that is required and your RAD8 will be able to back up data, check for updates and be accessed over the network by Capture. If your network has no DHCP server, or MAC address filtering access control, then this approach will not work, and you will need to work with your network administrator to determine a solution.
Most consumer Wi-Fi equipment is by default a wireless router and access point, and creates a private network with its own IP address space. This will not be equivalent to connecting the RAD8 “to a network jack” and the RAD8 will not be visible to the upstream wired network without customizing the configuration of the device to have it function as an AP only.
Once you have the access point set up, simply use the Wi-Fi name and password chosen during setup to connect the RAD8 to the network.
TP Link Access Point with Passive POE Adapter
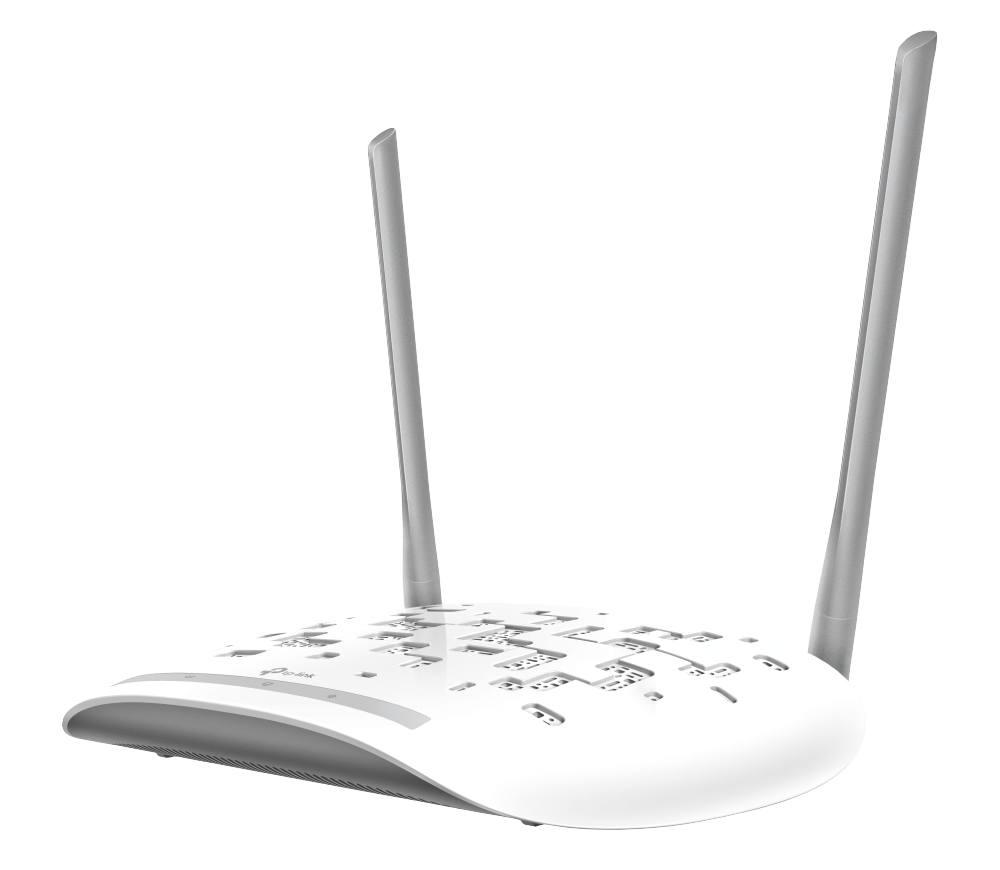
This low-cost consumer-level device [TL-WA801N] defaults to the Access Point configuration.
It is straightforward to set up, and includes a passive POE power injector so the AP can be powered through the Network cable, and be located far from a power outlet. If a power socket is readily available, the POE injector is not needed.
The quick start included with the device is available here and is easy to follow. The relevant steps are reproduced below.
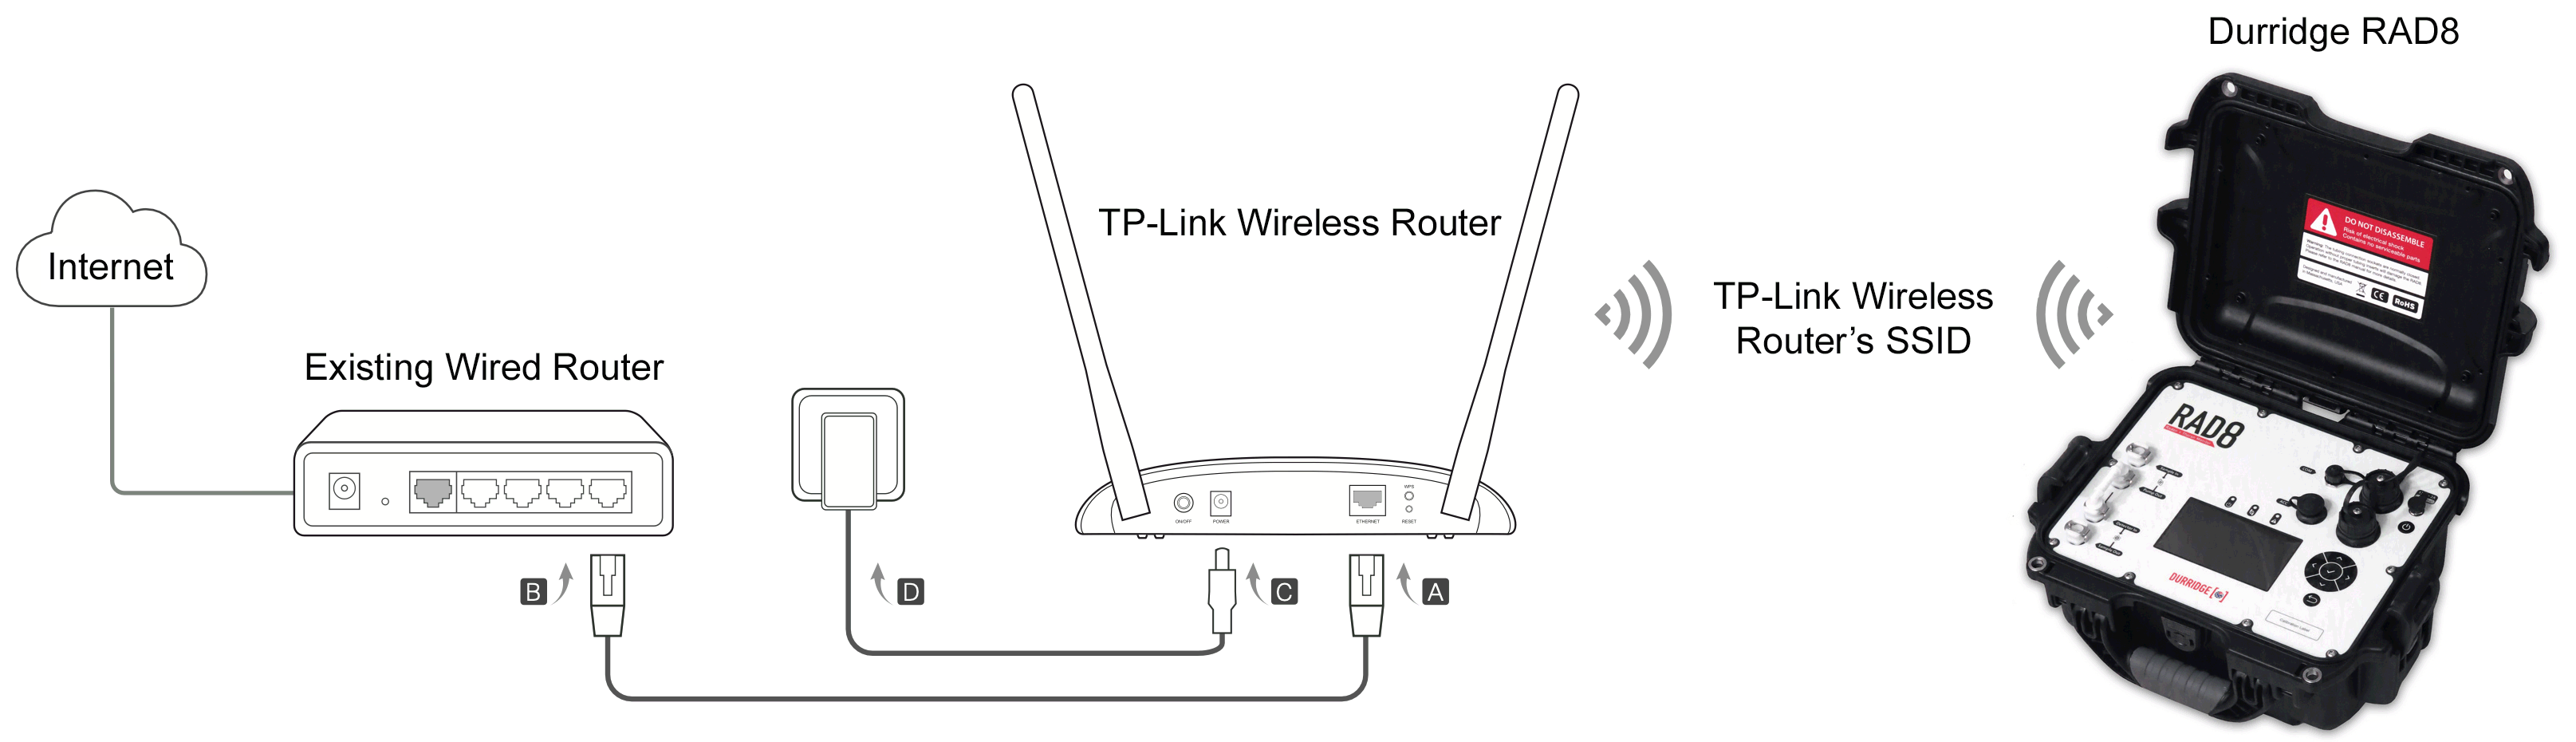
- Connect the access point according to Step A to D in the diagram.
- Turn on the power, and wait until the Power
 and Wireless
  LEDs are lit and stable.
 - Use the default SSID and Password printed on the label of the access point to join its Wi-Fi network.
- Launch a web browser and enter http://tplinkap.net. Create a password to log in.
- Click Quick Setup, select Access Point mode and click Next. Follow the step-by-step instructions to complete the configuration.
- Now, reconnect your wireless devices to the new Wi-Fi network.
Mikrotik mAP Lite
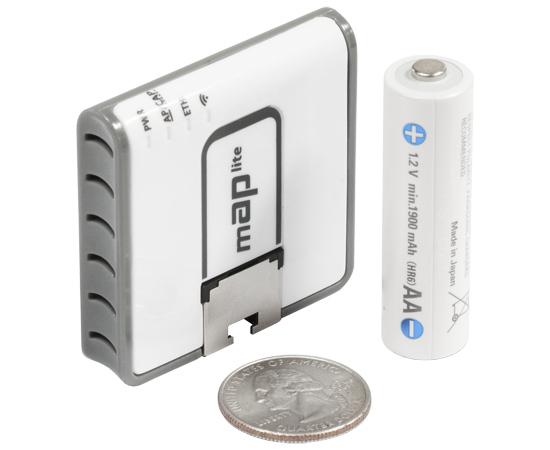
This incredibly tiny 2.4 GHz AP [MikroTik mAP Lite] is a great fit for a RAD8 being deployed in a remote cabinet or enclosure, particularly if you have professional IT support. The AP is powered from either standards-based Power over Ethernet (POE), in which case only the Ethernet wire needs to be connected, or via Micro USB from an included AC adapter or even from the RAD8 USB-A port with a Type A to micro USB cable. (Note that this does limit the power available and may have some performance impacts for the mAP. Powering from the RAD8 will also drain the RAD8 battery more quickly.)
Note that this device is extremely configurable, but not particularly user friendly. It is easy to mis-configure and have difficulty regaining access to the settings. In such cases, it is almost always possible to regain access to the device using MikroTik Netinstall and or Mikrotik Winbox, but these tools are outside the scope of this note.
For a first setup, follow these steps:
- Connect the network cable and power (or only network cable if powering via POE).
- Connect your computer to the open Wi-Fi MikroTik-XXXXXX where the Xs represent the last three groups of the Hexadecimal MAC address assigned to the wireless hardware.
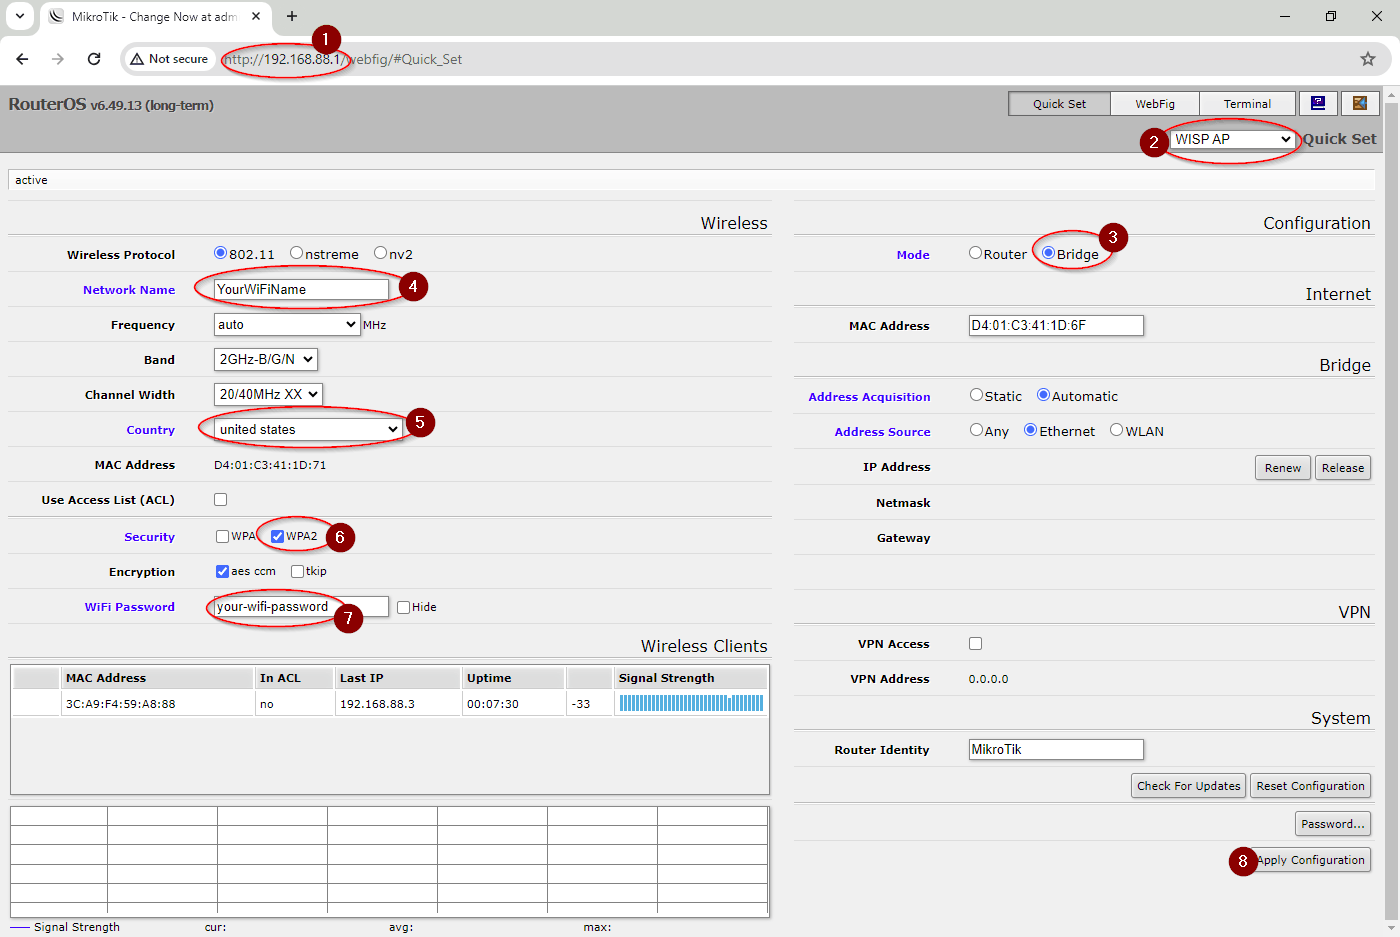
- Open 192.168.88.1 (circle 1 below) in a web browser. You will be prompted to sign in. The user name is admin and by default for the first boot the password is blank.
- You’ll be prompted to change the password. Leave “Old Password” blank, and enter a strong password to secure the admin account in the two “New Password” entry boxes. This is not the Wi-Fi password, and should not be the same as the password you will use later for the Wi-Fi. Do not lose this password. Select “Change Now” to finish updating the password.
- You’ll be greeted with a web interface like that pictured below. If your mAP Lite is upgraded to RouterOSv7, there will be some formatting differences, but all the settings will be present once you select “WISP AP” from the Quick Set dropdown. (circle 2)
- Change the Mode from “Router” to “Bridge” (circle 3)
- Choose a SSID for your Wi-Fi to broadcast (circle 4). Do not use spaces or special characters.
- Select your country to ensure compliance with Wireless emissions regulations. This is a very long list. (circle 5)
- Select WPA2 security, with aes encryption (circle 6)
- Enter your desired Wi-Fi password (circle 7).
- Select Apply Configuration Button (label 8) and wait for the device to reboot and begin broadcasting your chosen SSID.
If the mAP lite configuration is ever in an unknown state, it can usually be reset by holding the only button (a small grey bump/lever) and applying power. After holding the button for about 10 seconds, the Wi-Fi symbol and AP/CAP green lights will blink in an alternating fashion. Once they begin to blink, let go of the button. After another approximately 30 seconds, the device is then ready to set up, and will have a SSID that it broadcasts of MikroTik-XXXXXX where the Xs represent the last three groups of the Hexadecimal MAC address assigned to the wireless hardware, and you can re-do the configuration steps.
Tested APs
TP Link Access Point
Mikrotik mAP lite
Related Products
RAD8 Radon Monitor (HTML)
Durridge Capture Software (HTML)
Article PDF
View this article in PDF format:
RAD8 Wired Network Connection (PDF)