APPENDIX B: TOOLBAR COMMANDS
CAPTURE's Main Window contains a toolbar providing quick access to important functionality. The toolbar can be used to open RAD7 data files, switch between connected RAD7s, and perform utility operations such as renaming a RAD7 and downloading data from all connected RAD7s.
These commands are described in detail below.
Open File Button
The Open File button brings up the Open Dialog, in which a RAD7 Data File may be opened in a Graph Window.
RAD7 Selection Buttons
Each connected RAD7 is represented as a toolbar button, labeled with a serial number or custom RAD7 name. The content of the Main Window pertains to whichever RAD7 is currently selected in the toolbar.
Add Device Button
The Add Device button manually adds a new RAD7 or DRYSTIK. It is necessary to add a device manually when it is being reached via a local network. Additionally, a RAD7 must be added manually if it does not have RADLINK installed and can not be discovered automatically. When a device is added manually, the Connection Settings panel appears. This panel is described in detail in the Connecting to the RAD7 section.
Options Menu
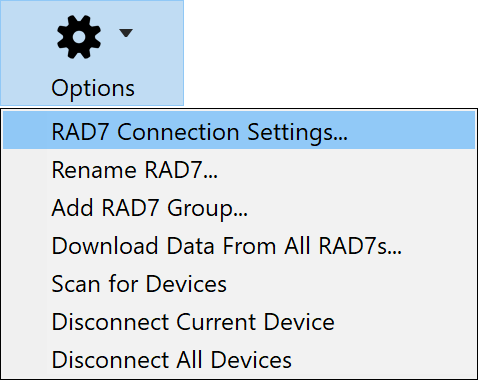
Figure 1: The Options Menu in the Main Window toolbar.
The Options Menu is labeled with a gear icon and consists of several commands:
RAD7/DRYSTIK Connection Settings
The RAD7/DRYSTIK Connection Settings command brings up the Connection Settings panel, which can be used to specify how the computer connects to the selected device. It is also used when connecting to a RAD7 or DRYSTIK via a local network. The Connection Settings panel is described in more detail in the Connecting to the RAD7 section
Rename RAD7/DRYSTIK...
The Rename RAD7/DRYSTIK command brings up a dialog box in which a new name for the selected device may be entered. The specified name appears under the device's icon in the toolbar. If no name is specified, the RAD7 or DRYSTIK is referred to by its serial number.
Add RAD7 Group...
The Add RAD7 Group command creates a new RAD7 Group for the Chart Recorder and displays the RAD7 Group Configuration dialog, which which is used to specify the group's name and its member RAD7s. More information is available in the Monitoring RAD7 Groups section.
Download Data From All RAD7s
The Download Data From All RAD7s command makes it possible to quickly obtain all of the raw data from each connected RAD7. This process is described in the Downloading From All RAD7s section.
(Re)scan for RAD7s
The Rescan for RAD7s command detects all of the RAD7s that are attached to the computer and adds them to the CAPTURE toolbar. Any RAD7s that were detected previously are removed, then rediscovered. The Rescan for RAD7s button at the lower right corner of the Main Window performs the same function as this menu command.
Disconnect Current RAD7/DRYSTIK (or Remove Current RAD7 Group)
The Disconnect Current RAD7/DRYSTIK (or Remove Current RAD7 Group) command disconnects only the currently selected RAD7, DRYSTIK, or RAD7 Group. It may later be restored by rescanning for devices or by manually adding a device or RAD7 Group.
Disconnect All Devices
The Disconnect All Devices command disconnects all RAD7s and DRYSTIKs and removes any RAD7 Groups, leaving the Main Window empty. Devices may later be restored by rescanning or by adding them manually.
Help Menu
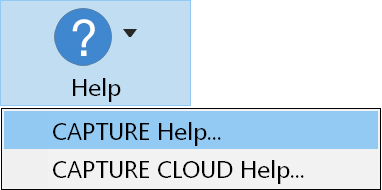
Figure 2: The Help Menu in the Main Window toolbar.
The Help Menu provides quick access to the CAPTURE User's Manual. The CAPTURE CLOUD Help command within the Help Menu connects directly to CAPTURE CLOUD section of the manual.