EVENT-DRIVEN ACTIONS


CAPTURE can be configured to perform specified sequences of actions when particular sets of conditions are met. For example if a RAD7 reports a radon concentration that is greater than a certain value, CAPTURE can respond by playing an alarm sound and/or sending an email notifying the user. There are 11 categories of conditions that may be evaluated, and 13 types of actions that may be performed in response, allowing a wide variety of custom configurable behaviors. A particular combination of conditions and associated responses is called an Event-Driven Action. The toolbar in CAPTURE's Main Window provides access to the Event-Driven Actions panel, which is used to create and configure Event-Driven Actions, as shown in Figure 1, below.

The use of Event-Driven Actions is restricted to CAPTURE CLOUD subscribers. Therefore it is necessary to sign in to CAPTURE CLOUD before Event-Driven Actions can be executed. CAPTURE will remember when the last sign in took place, and if it was within 30 days, the use of Event-Driven Actions will be permitted. This makes it possible to use Event-Driven Actions even if an Internet connection is not continuously available. If you are not a CAPTURE CLOUD subscriber it is still possible to create and configure Event-Driven Actions, but they will not be able to be executed.


Managing Event-Driven Actions


To create an Event-Driven Action, click the Plus button [+] near the bottom left corner of the Event-Driven Actions panel. A new untitled Event-Driven Action will be added to the list on the left side of the window. To delete an Event-Driven Action, select it in the list and click the Minus button [-], which is next to the Plus button. The configuration of the Event-Driven Actions will be saved when CAPTURE is closed, so they will be available for use in future sessions.

When an Event-Driven Action is selected in the list, its properties appear in the tab panel to the right. There are three categories of Event-Driven Action properties that can be edited, and these are found within tabs labeled General, Events, and Actions.

To enable or disable Event-Driven Action functionality, use the main switch control at the top right corner of the window. If this switch is turned Off, Event-Driven Actions can still be configured, but they will not be executed, even if the specified conditions have been met. It can be useful to turn Event-Driven Actions off before editing them, and then turn them back on once editing is complete. This prevents Event-Driven Actions from being triggered prematurely, before they have been fully configured. Note that if you are not a CAPTURE CLOUD subscriber, or have not signed in to CAPTURE CLOUD within 30 days, the main switch will be remain Off and it will be disabled.


Configuring General Properties


The General tab is used to configure the basic properties of the selected Event-Driven Action, as shown in Figure 1, below. These include its name, whether it is enabled, whether it is triggered when any versus all of the specified events are occurring, how often actions should be executed when the specified events are occurring, and whether the timing of the Event-Driven Action is reset when the required events are no longer occurring.


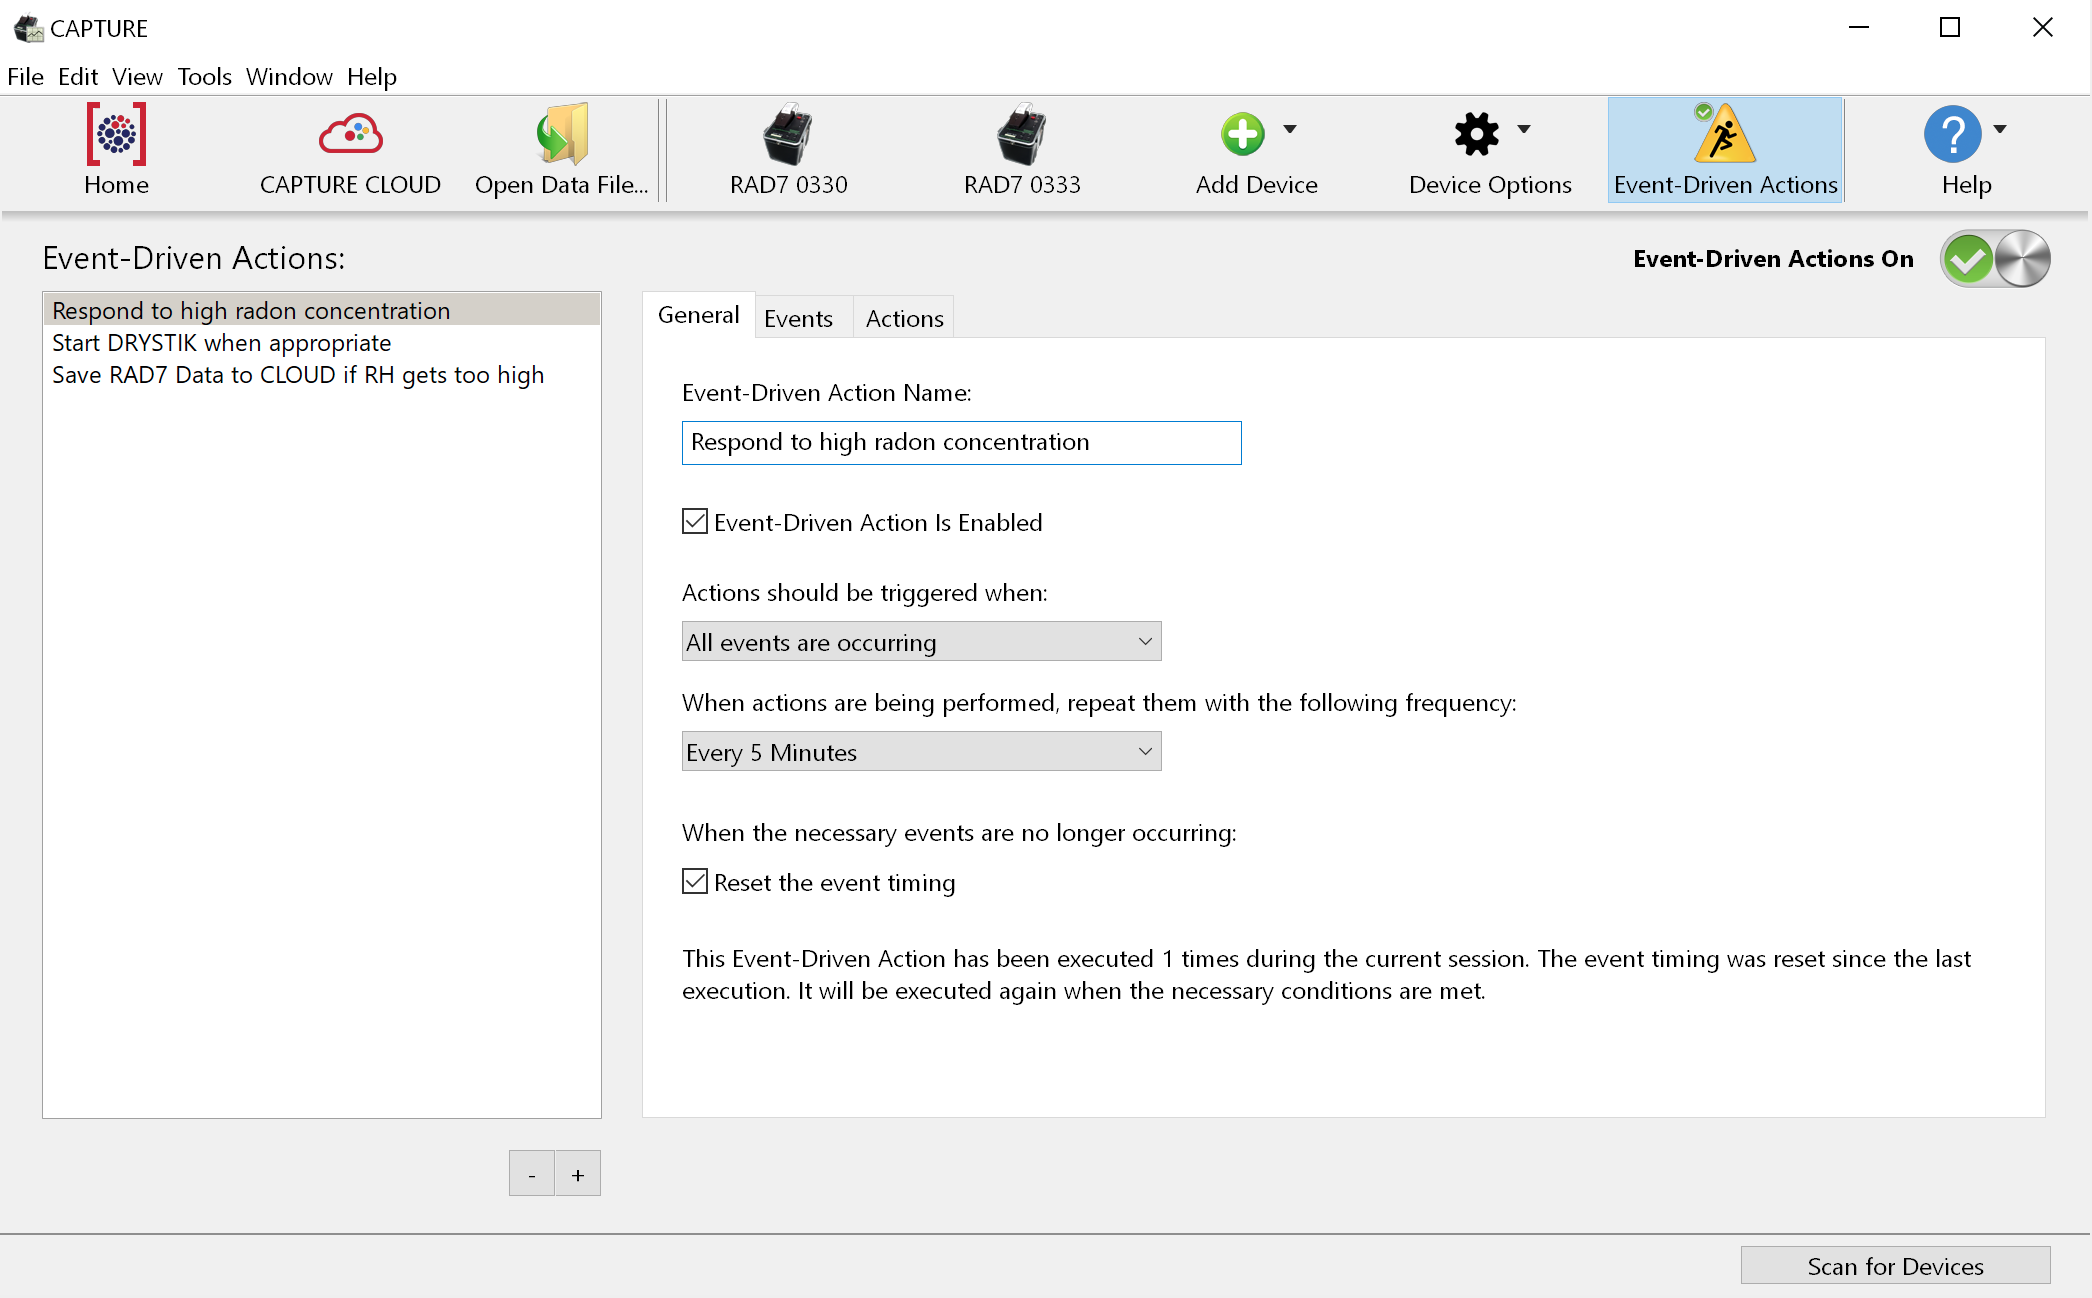
Figure 1: The General tab in the Event-Driven Actions panel.


Setting Up Events


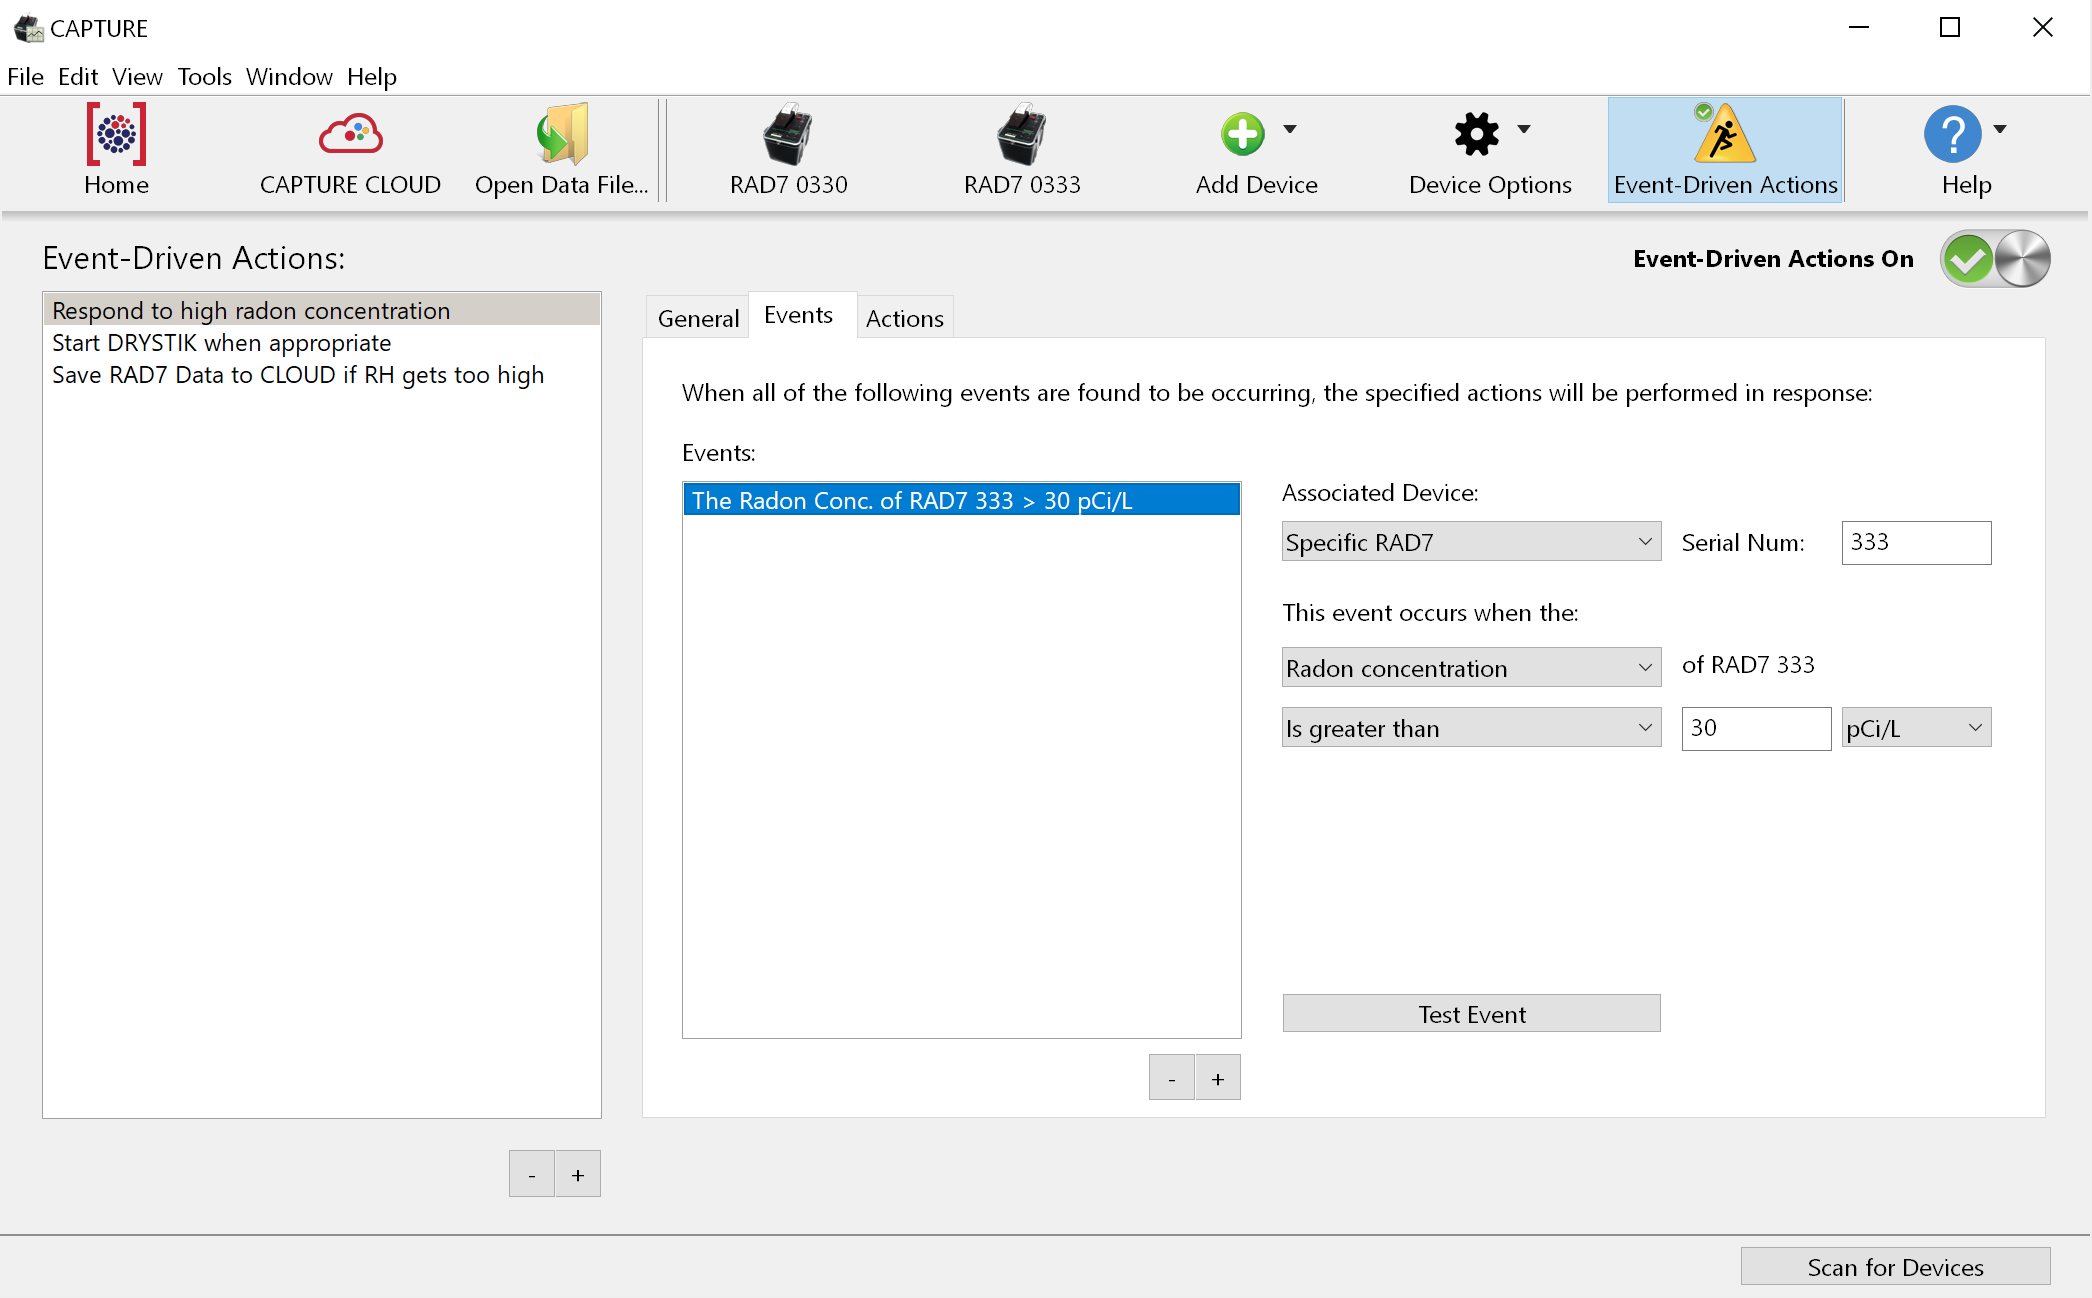
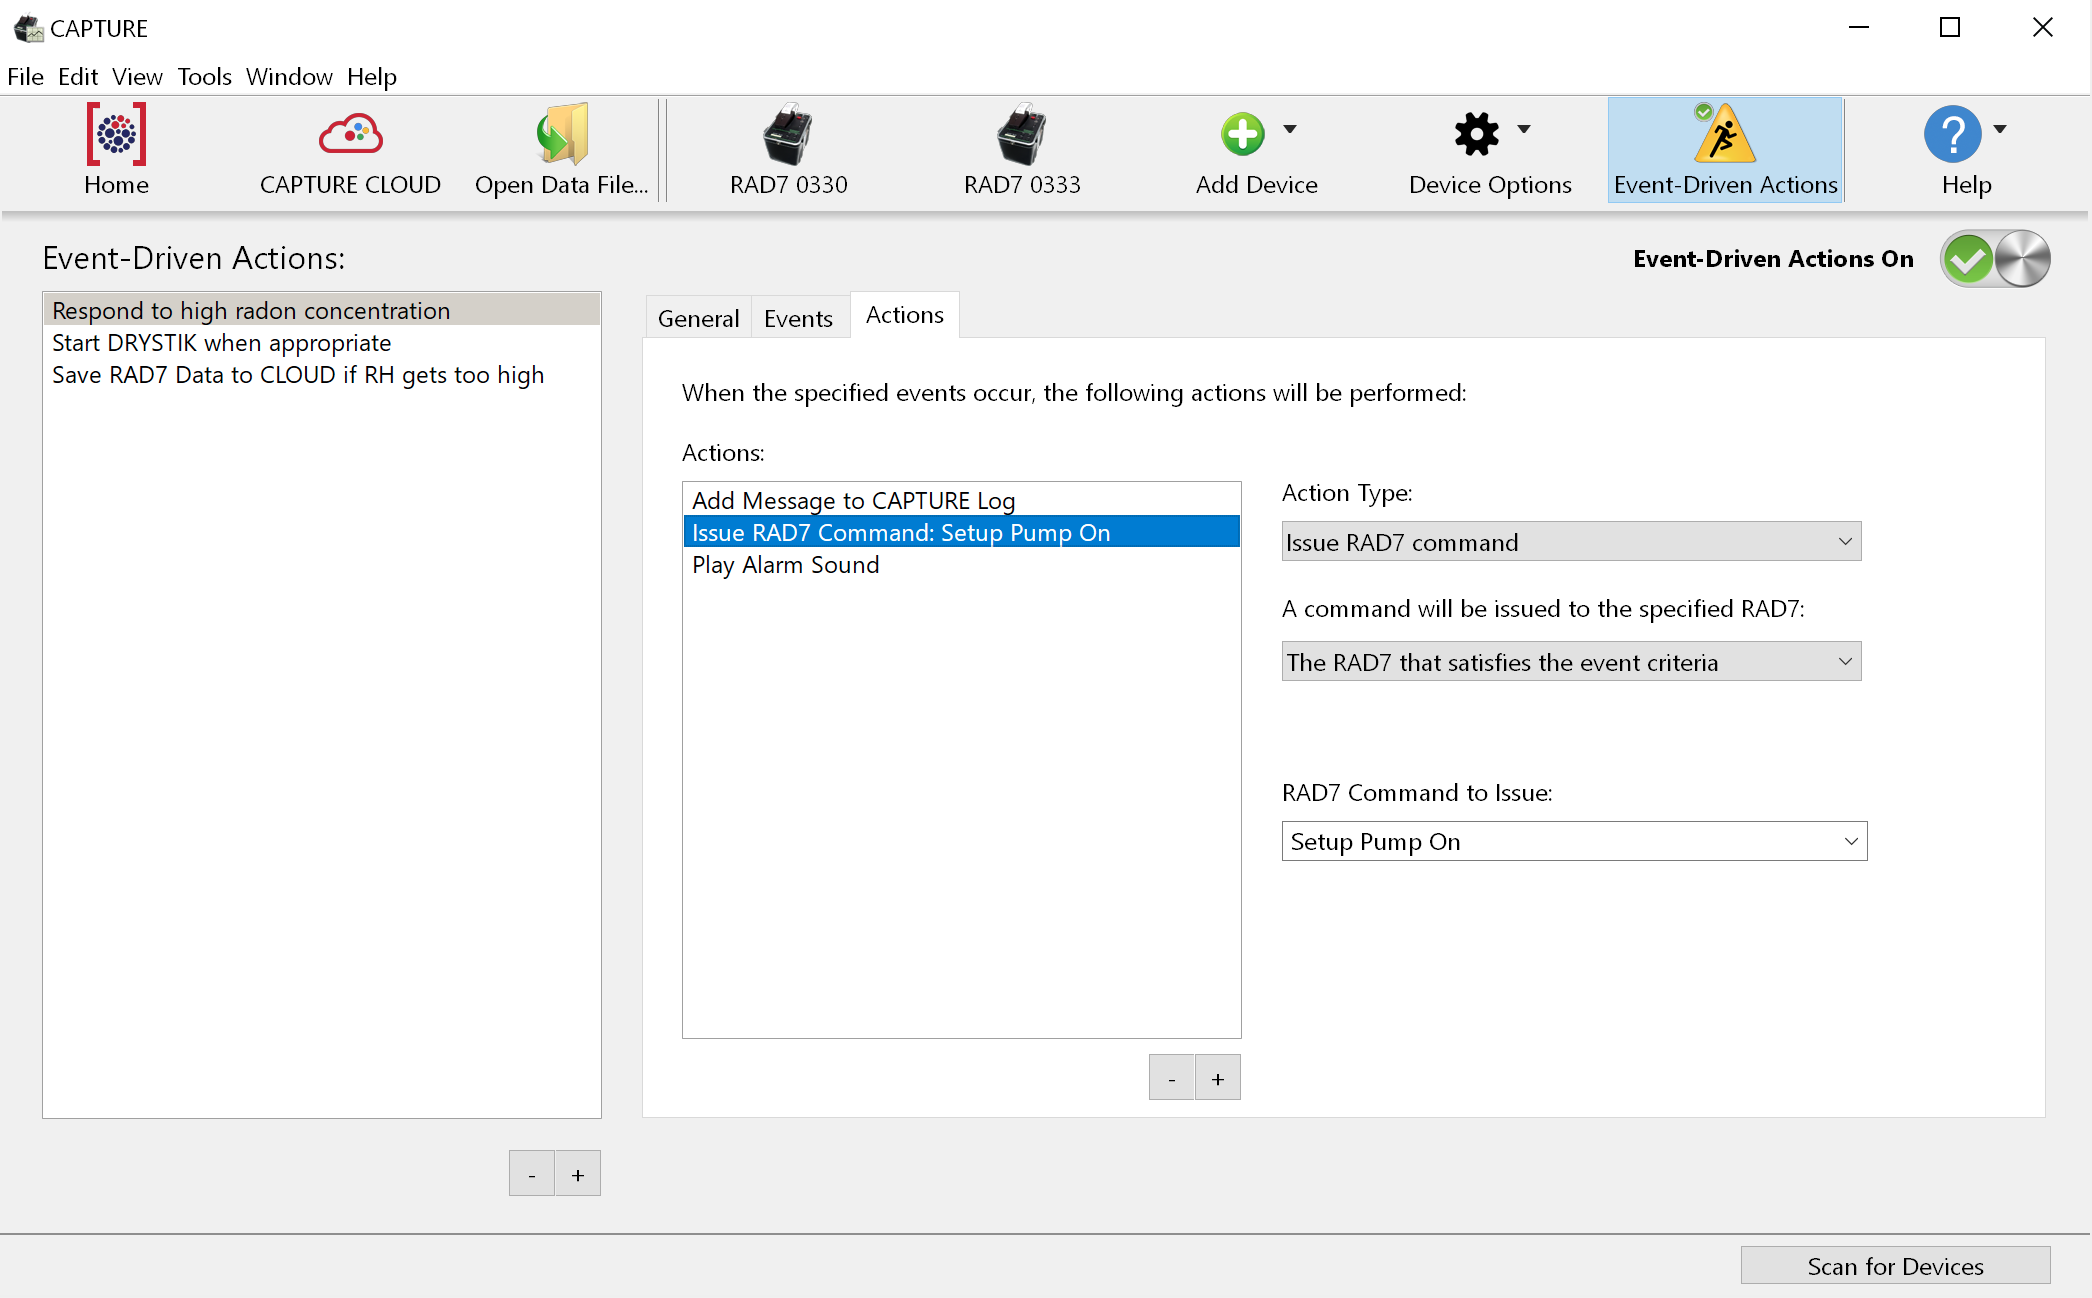
The Events tab, which is shown in Figure 2, is used to specify which events must occur in order for the selected Event-Driven Action to be executed. Any number of events may be attached to an Event-Driven Action. To add an Event to the selected Event-Driven Action, click the Plus [+] button at the bottom of the Events list. To remove an Event, select it in the list and click the Minus [-] button.

The definition of each Event includes a device, a device property, a comparison type, and a value to which the property is compared.

The Device may be set to either Any RAD7, or a Specific RAD7. If Specific RAD7 is chosen, its serial number must be provided.

The possible device properties that may be evaluated include a RAD7's Battery voltage, Connection status, Counts per minute, Cycle number, Data Free value, Pump current, Radon concentration, Relative humidity, Run number, Temperature, and Thoron concentration.

Each of these properties are compared to a specified value using one of the following comparison criteria: greater than, less than, equal to, not equal to, greater than or equal to, and less than or equal to.

When the device, device property, comparison type, and comparison value have been specified, the description of the Event is updated in the Events list accordingly.

If any (or all) of the specified events are found to be occurring, one or more Actions will be performed in response.


Figure 2: The Events tab in the Event-Driven Actions panel.


Setting Up Actions


The Actions tab, which is shown below in Figure 3, is used to specify which actions occur when the necessary conditions have been met and the selected Event-Driven Action is executed. Any number of actions may be attached to an Event-Driven Action. To add an Action to the selected Event-Driven Action, click the Plus [+] button at the bottom of the Actions list. To remove an Action, select it in the list and click the Minus [-] button.

The following categories of actions are supported: Add message to CAPTURE Log, Advance RAD7 to next run, Erase RAD7, Issue RAD7 command, Play alarm sound, Save RAD7 data to CAPTURE CLOUD, Save RAD7 data to disk, Send email, Set RAD7 relays, Start RAD7, Stop RAD7, Start DRYSTIK, and Stop DRYSTIK.

Each action has a set of parameters that must be configured. For example when configuring the "Save RAD7 data to CAPTURE CLOUD" action, it is necessary to specify which RAD7's data will be saved, whether to save all of the RAD7's data or just the latest run, whether to include the RAD7 serial number and date in the file name, and more.

When an Event-Driven Action is executed, its actions will be executed one at a time, in the order in which they were added to the Actions list.


Figure 3: The Actions tab in the Event-Driven Actions panel.